
How to Satin Stitch
Ever admired those silky, filled-in shapes in embroidery and wondered how to get that smooth, glossy look? That’s the magic of satin stitch! Perfect for filling in petals, dragon scales, leaves, or any shape that deserves a little extra shine.
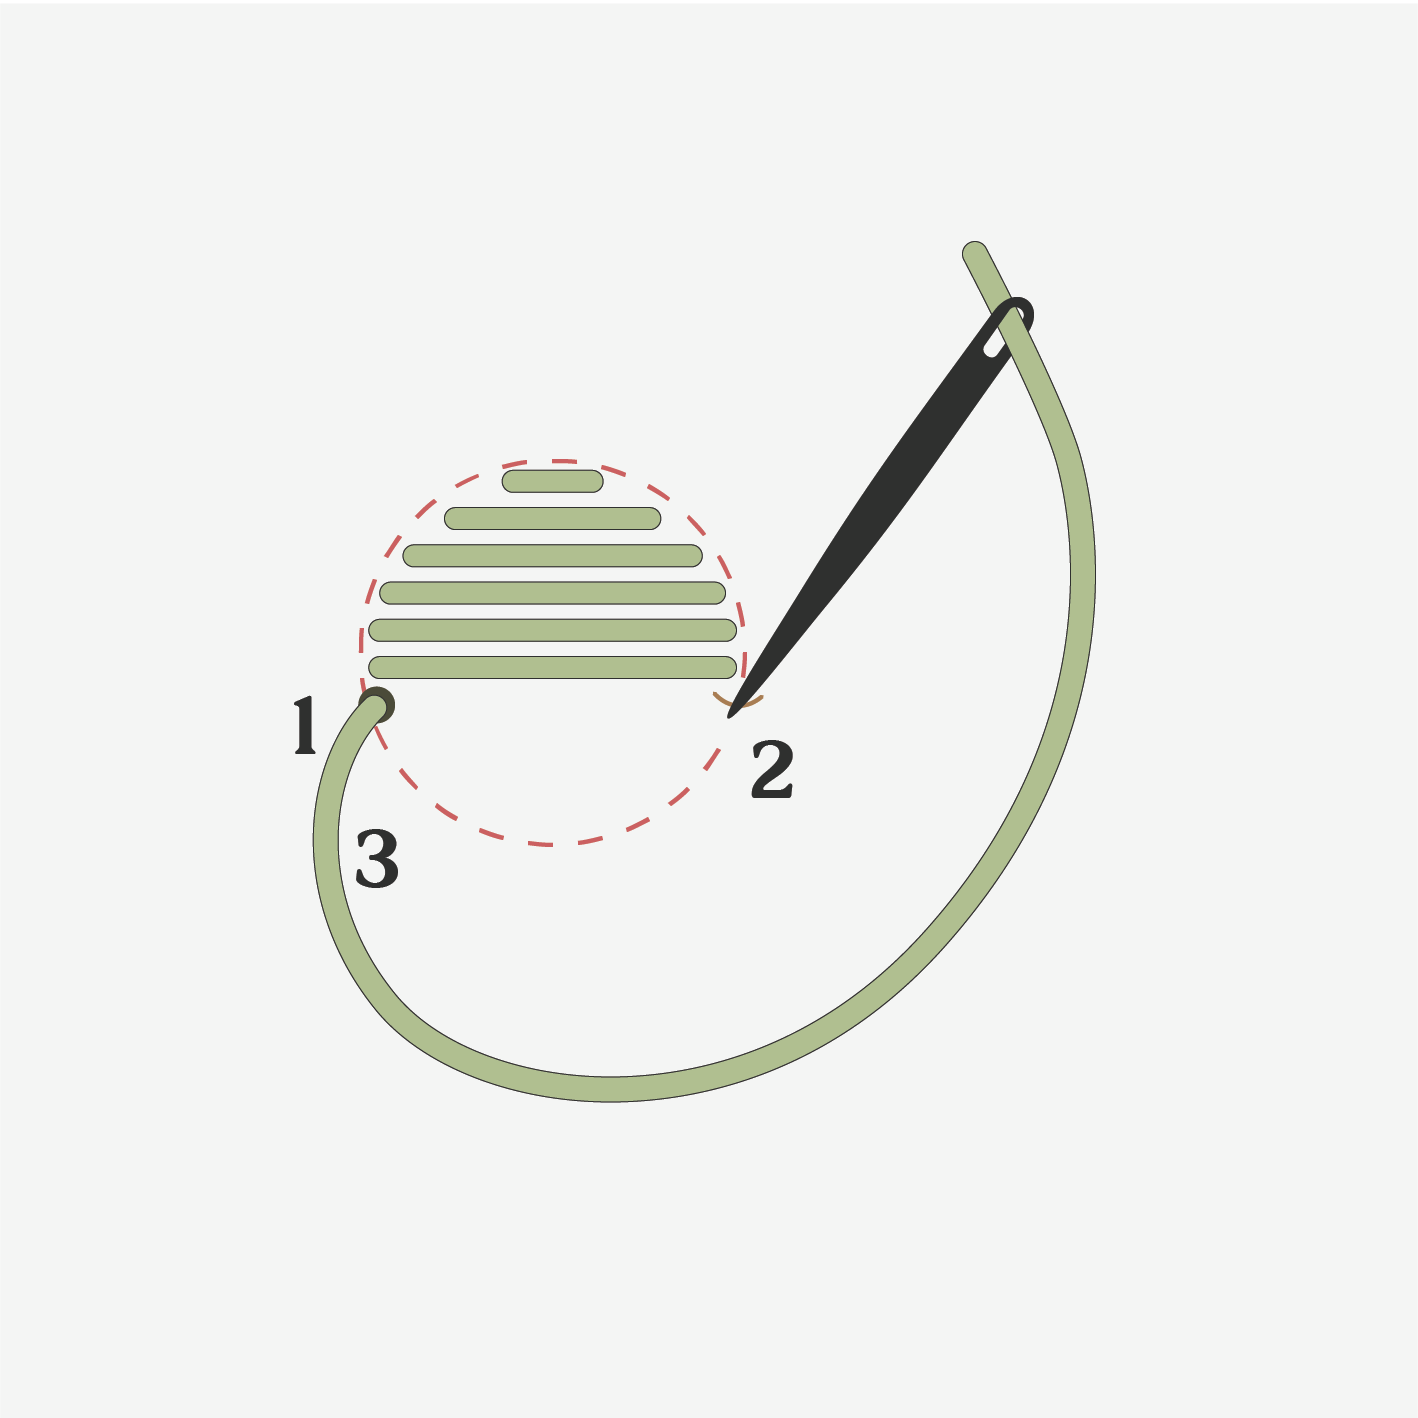
How to Satin Stitch:
Bring your needle up through the fabric at the starting edge of your shape (point 1).
Insert the needle back down at the opposite edge of the shape (point 2).
Come up again just below your first stitch (point 3) and continue filling the shape with parallel stitches.
Repeat, keeping your stitches smooth and close together until the shape is fully filled.
Tip: Keep your stitches consistently close together for a polished look. Don’t worry if your first attempt isn’t perfect — satin stitch is forgiving, and a little practice makes your shapes shine beautifully.